Thursday 24 January 2013

Argan Oil


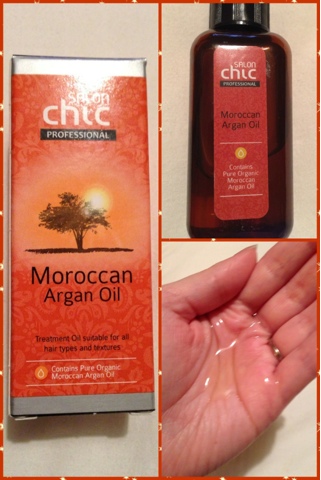
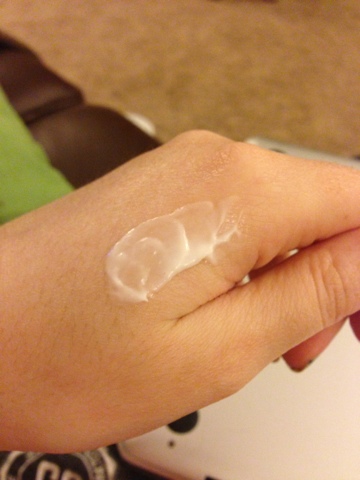
A selection of photos showing Moroccan Argan OIl in it's packaging, bottle and consistancy


Moroccan Argan Oil is my current favourite product. My hair takes a lot of heat abuse and the ends are quite dry and weak due to my dip-dye so I need a pretty hardcore product to get it back to a good condition. I've read about this product on Laura's Blog and when my parents said they were off to home bargains, I told them to keep an eye out for it. Luckily for me, they returned £2.99 poorer and with my Argan Oil.


I have the treatment oil which you apply to damp hair. The oil itself is quite thick and smells quite sweet. You take a few drops of the oil and work into toweled, but damp, hair before blow drying.


This brilliant Moroccan Argan Oil gives the hair UV protection (UV dries out the hair and makes it brittle) and the vitamin E found in the Oil helps keep hair frizz free and healthy.


Here are the results on my hair:


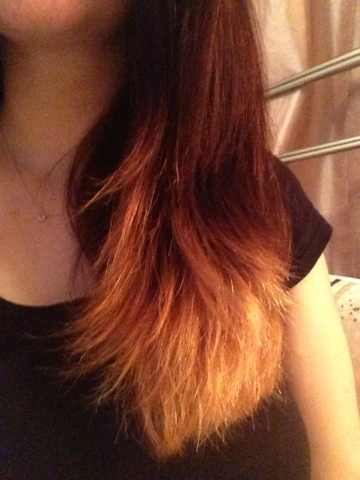
A picture of Roxy's hair wet
Oil on hair whilst wet


A picture of Roxy's Hair looking fluffy and healthy
My hair dried

While my hair looks pretty normal in the photos, I can assure you that the Argan Oil has made a big difference. My hair is smooth and silky, my split ends are controlled and my dip dyed ends aren't so dry. The sweet smell of the oil has also transferred onto my hair and it's much easier to brush. I was worried about my hair becoming oily but after not washing my hair for a week (the things I do to test products ;) ) it was still silky smooth.

This is my absolute star buy and for £2.99 you get 100ml which should last quite a while as you only need a couple of drops for each application. I would definitely recommend going down your local Home Bargains to dig out this little wonder.

Have you tried Moroccan Argan Oil?
Tuesday 22 January 2013

Pedi Pro, meet my Hobbit toes.

Over the Christmas break, I was watching Stephen Fry: Gadget Man when he done a feature on the PediPro Deluxe. The PediPro Deluxe is a pedicure treatment with a rotating head which removes dead and callous skin. I was very lucky to receive one of these PediPro Deluxe for Christmas off and decided it was about time to use and review it.

I would advise any readers who do not like feet/toes to look away now ;)

PediPro

Left Picture: This is the PediPro Deluxe with it's lid on. It's a handheld device and takes up little room.

Right Picture: This is my big toe which has heaps of dead and hand skin. I'm going to test out my PediPro Deluxe on this toe.


 Left Picture: This is the Buffing Disk head designed to gently remove the hard and callous skin.

Right Picture: My toe after using the Buffing Disk. Already there's a huge difference (although it has taken some of my nail varnish off!)


Left Picture: This is the Buffing Pad head designed to finish off your feet. This leaves the skin smooth and silky.

Right Picture: My toe after the Buffing Pad. You can see how smooth my toe now is. No hard skin in sight!


Pedi ProI am really impressed with this product. Not only did it remove the hard skin and soften my toe up, but the whole process only took a few minutes. The sound it made when I first turned it on was a little off putting but it doesn't hurt on either of it's two settings. The only downside for me, is that when using the Buffing Pad, white dusk (skin cells- ew), collects on the side of the machine and flies up into the air and because of this, I had to stop a couple of times to clean the excess dusk away. I also found that if you use the PediPro Deluxe on good skin for too long, that it'll feel a little hot on your skin.

Overall, I would recommend this to anyone with hard skin on their feet. It's made a huge difference to the appearance of my toe (see picture on left). The PediPro Deluxe also comes with a pouch to store it in, extra Buffing Pads and a little brush to clean with. The only thing that you need to get going, is 4xAA batteries.

The PediPro Deluxe currently retails at £19.99 - Bargain.


Have you used the PediPro Deluxe? Would you consider buying one?

Monday 21 January 2013

MUA constellations; Stars in your nails.

 I recently purchased Nail Constellation by MUA in the Scorpio colour scheme. There are five different colour options in the Constellation range; Scorpio, Pisces, Leo, Gemini and Libra. You might have noticed that there's only five out of the twelve constellations so I'm hoping that MUA will expand the range. I went for the Scorpio set because of the colour of the beads; green, gold and pink.


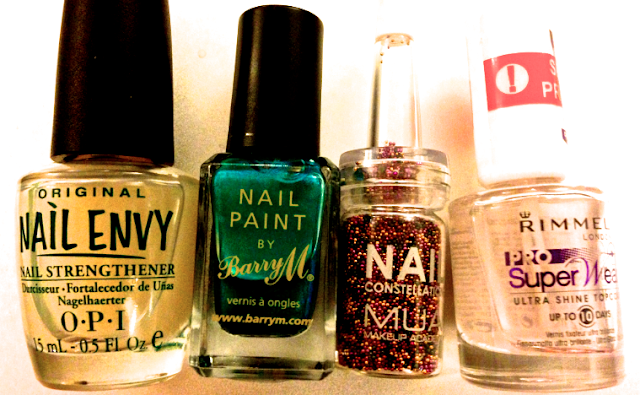
A picture of Opi's Nail Envy, Nail paint by Barry M, Nail constellations and Rimmel pro super wear.

Before I paint my nails, I use 'OPI Nail Envy' nail strengthener. I love this product for a number of reasons; it strengthens my nails, protects them from staining and dries really quickly. To compliment the gold and pink, I paint my nails in 'Barry M's Nail Paint' in colour 334, Teal. In the pictures below, I am wearing two coats of the nail polish for a fantastic deep colour. To protect my nails from chipping, I use 'Rimmel Pro Super Wear', a top coat, which gives a really amazing high shine and protects from chips for roughly ten days.

On my ring finger, once my second coat of nail paint had been applied, I sprinkled the MUA constellations onto the wet nail until it was completely covered. I would advise doing the constellations over a small tray as they do go absolutely everywhere otherwise. Once I was sure that my nail had dried and the constellations had stuck, I gave a quick once over with the Rimmel top coat.


A picture of Barry M's nail paintA picture of MUA constellations in the bottle

I'm really pleased with the result of the nail constellations. It gives my nails a really high end look but on a budget. I would definitely recommend.


Have you used the MUA nail constellations? What did you think? 
Sunday 20 January 2013

Are you fur real?

A picture demonstrating the application process of MUA's fur real nail effects
Beautysets - MUA application with Barry M
MUA Fur-Effect Nails in colour 'Fluffy Bobbin' is available at Superdrug for £2

Tuesday 15 January 2013

My Primark SS13 Pieces

Fashion isn't my strong point but when Look magazine showed off Primark's SS13 pieces, I couldn't help but be excited. There are four pieces that really popped out at me when I looking through the collection;

China Print Dress, £20


 Favourite!

This China print dress is the cutest thing ever. I can really imagine going out on a sunny day with friends for some tea. It's definitely a must have for me. I'd pair it with a white shrug, white shoes and a popping red brooch or red scarf to add some flare and break up the white/blue combination.


Classical Cut Out Leotard, £8


 I was unsure about this Leotard at first. I couldn't quite understand why someone would wear a leotard or what to pair it with until my friend explained that they work really well for high waist skirts. I'm always struggling to find something that goes with my leather skater skirt and I think this would be ideal. The cut out sides do bother me slightly, but I'm hoping that it gets hidden by the skirt. I'd also wear this with some killer heels to really make a statement.


Embroided Patch Denim Shirt, £12


 This denim shirt is really cute. With a dip dye effect on the sides and embroidery on the shoulders, I can imagine this will be in every girls wardrobe. I'd pair it with dark jeggings or skinny jeans, sandals and a huge canvas bag. A perfect shopping outfit!


My last Primark SS13 piece is this Cream Studded Tote Bag (Price TBA). Totes are just the right size for storing all your essentials without being weighed down by a giant shopper. The only criticism I have with this bag is it's colour as I know that cream always stains so easily. However, the studs are bang on trend and this would look fantastic with any of the pieces I've mentioned above.


To see the full Primark SS13 collection, head over to Look Magazine. I'd love to know which pieces are your must haves so make sure to leave a comment!


Sunday 13 January 2013

Winter Graduation Outfit

On the 10th of January, I became a Master of Art in Philosophy. Choosing an outfit was difficult for the occasion for a number of reasons;

1. It was a graduation and the dress code states smart wear,
2. As it's winter, my outfit needed to be warm,
3. I needed  an outfit that wouldn't clash with my University colour of green and sash of pink,
4. Finally, I needed something that covered up the unsightly external fixation on my leg.

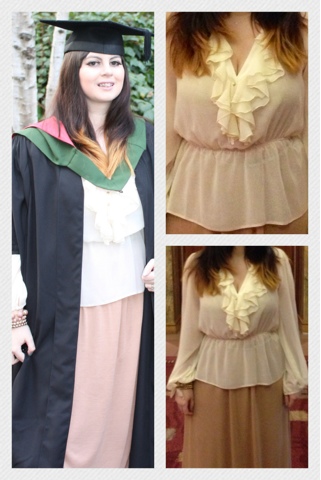
Overall, I think I done well choosing an outfit. The Skirt and Blouse were £25.00 each from River Island online. I ordered the Skirt in a size 14 and I'm 5'3 so it was an inch or so too long for me. The outfit was a hit as looked smart, it didn't clash with my graduation robes and the maxi skirt was perfect for covering my leg. The only problem with the outfit was that the light materials did not keep me warm but had my graduation been in the summer, I would give 10/10.

I accessorised the entire outfit with a cute gold ear cuff and a bangle stack in peach and gold from New Look. The shoes were a nude ballet pump from Internacionale

Everyone commented how good I looked and I really did feel it.

What outfit would you wear to a winter graduation? 
Thursday 10 January 2013

Flutter your lashes

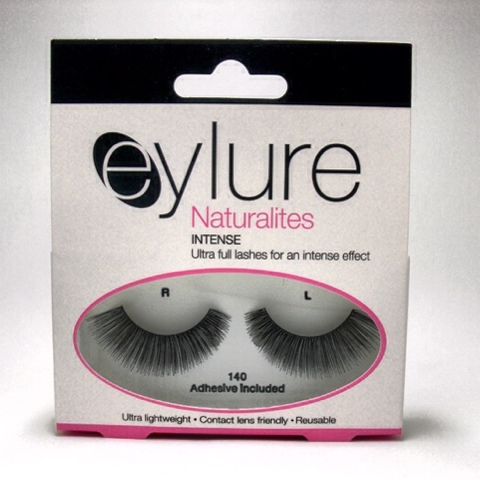
Hello! In preparation for my graduation, I wanted something to make my eyes pop and distract from the cage on my leg and the braces in my mouth. The obvious way to go was to get some fake eyelashes so we popped on down to Debenhams. I went for the Eylure Naturalites Intense lashes in number 140. They were normally priced at £5.26 but as I used a £5 voucher with Debenhams Beauty Club I paid just 26p. Result.


 The lashes were relatively easy to apply.  Two coats of mascara on the natural lashes, glue on the strip of false lashes and apply to the eye.
 Here are the results:

Looking Down
Looking Up.


The only complaint I had was that the lashes were a bit hard in texture and when it caught my eye, it was quite painful. Overall, I was impressed with the look and the thickness and it definitely made a statement.


Do you wear false lashes? Do you have any tips for applying them? Let me know in the comments!


Tuesday 8 January 2013

Viridian nail varnish.


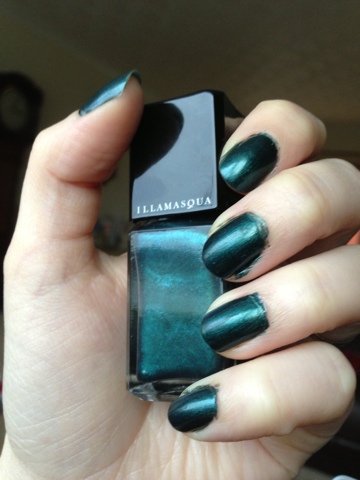
I received an Illamasqua box full of goodies for Christmas. One of the items was the beautiful Illamasqua Viridian nail varnish. The website describes the colour as 'peacock green, metallic finish'  but I would descirbe it more as a dark teal with a shimmer. In natural daylight the varnish looks like a darkened blue but when artificial light or bright sunshine, it looks more of a dark green.

Picture shows two coats of nail varnish.

I used two coats of the nail varnish as I didn't find one coat gave satisfactory colour. It looks fantastic on my pale skin but I imagine it to be great for other skin tones.

The only problem with this product is the price; £13.50 for 5ml 0.5 FL. OZ but the price does match the quality as I had no chipping and the colour remained bright for the entire time I wore it.

Would you fork out £13.50 for a nail varnish or keep to cheaper brands?
Thursday 3 January 2013

Indian Night Jasmine


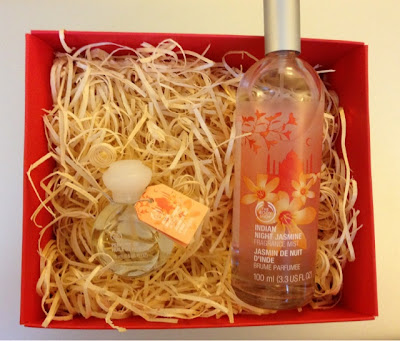
One of the presents I received for Christmas was the Body Shop Indian Night Jasmine set. It came in a beautiful red box, packaged by workers in Nepal. The pay for the packaging goes to disadvantaged girls to get an education; a good cause and a great product.
Beautiful Packaging.

Inside the box there's the Indian Night Jasmine Fragrance Mist and the Perfume Oil. 


Indian Night Jasmine Fragrance Mist. 
I found the best way to use the mist is right after a shower or bath and spray it all over. The fragrance is sweet and musky with floral undertones. It's a pleasant smell but the scent doesn't last for very long and I wouldn't wear it on it's own. 

Indian Night Jasmine Perfume Oil.
The perfume oil is amazing when paired with the fragrance mist as it lasts so much longer. The bottle is quite small but great for popping in your handbag for a top up when out and about. 


Have you used any of Body Shop's fragrance mists or perfume oils? What did you think of them? 

Wednesday 2 January 2013

Mini Haul

Today I was feeling a bit sorry for myself and needed a little treat so off to Boots I went. This is what I got:


1. Montagne Jeunesse Mud Pac- Dead Sea, Anti Stress. £1


I've used this brand before and I've enjoyed them. It's good to find a face mask that simply washes off rather than peels off- I hate the peel off masks. The mask is suitable for all skin types and vegetarians. On the back, it informs me it contains Dead Sea Salt, Bergamot, Lavender and Seaweed; all are very balancing and great for circulation but appear quite far down on the ingredient list so probably won't make a huge difference to my skin. I will be using the mask soon and will do a proper review then so watch this space!


2. Balmi- Raspberry. £4.99


I must admit that when I picked this up off the shelf, I thought it was Eos Lip Balm, a blogger favourite. Despite it not being what I was after, I thought I'd give it a go. Balmi is really fragrant and has a 15 SPF  protecting the lips from UVA/UVB. You apply it straight to the lips, saving you dipping your finger in greasy lipbalm (something I don't like doing). It sinks into the lips after a few minutes and gives a good shine on the lips. The Balmi also has a little keychain attachment to hook onto your bag/phone/keys - handy for anyone who loses their balm easily (like me).


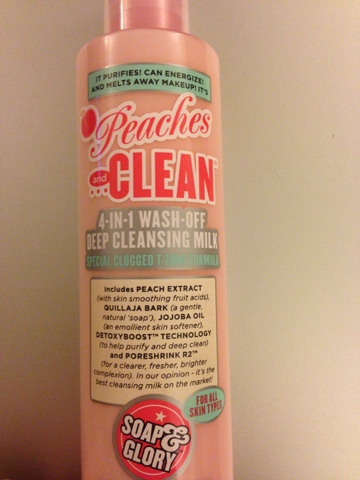
3. Peaches and Clean- 4 in 1 Wash off deep cleansing milk. £6


I've read great reviews on Soap and Glory and really needed a new everyday wash which isn't too harsh for my skin. I have combination skin and my T-Zone is very oily, something this product promises to help with. The product smells pleasant and is gentle on the skin, I'll review the product again after a few weeks of using it and let you know whether it clears my skin. 


Have you used any of these products? What did you think of them?

-Roxy
Tuesday 1 January 2013

Ken Picton Salon - Review


I went to Ken Picton's salon on the 29th of December as part of my christmas present off my parents. Whilst my parents are regulars of the salon, I have only been once or twice in the past.

The Salon. 

Upstairs

The salon has two floors and is clean and modern. Hot, cold and alcoholic drinks are offered and complimentary and free samples are readily available for you to take home. The washing basins upstairs  feature massage chairs and a hair massage will be given as your hair is washed.

The Staff.
The staff are lovely and will go out of the way to make you feel comfortable. They accommodated the salon so it was easier for me to get around on crutches and gave me plenty of time to move from washing basins to the styling chair. I'm not one to chat whilst I'm having my hair cut and my stylist understood this and didn't try the usual 'Where you going on holidays? What've you been up to?' chit chat. My mam, however, was in full blown conversation with her stylist who not only remembered her from last time but also remembered their conversation; she knew I was about to graduate and commented on it.

The Cut.
After a review with my hairdresser, we both agreed that I was in desperate need of a treatment for dry/damaged hair and the split ends taken off. The hair treatment was applied when wet and stayed on for five minutes. The cut was generally quite quick and only an inch was taken off. What I was most impressed by was the way my hair was styled afterwards. My hairdresser managed to curl the ends using the hairdryer, something I'm always trying to achieve.

Downstairs
Overall.
I really enjoyed myself at Ken Picton's Salon. The only downside is the price as I had a senior stylist but looking at the website, they do offer the chance to have your hair cut by a graduate for a cheaper price. Overall, my hair looked amazing and my self esteem had been lifted (and you can't put a price on that).

5/5


Visit the Salon here; http://www.kenpicton.com/


-Roxy

New year, new start.


Hello! 

Got this lovely Models Own nail varnish set for Christmas. It's a cute gold colour with a handy black nail art pen. The pen has two attachments; a small brush and a fine pen. I decided to give a leopard print    design a go and was surprised how easy it was. Two coats of the gold and for the splurges of black, I used the fine pen attachment and drew a bunch of lopsided C shapes. Super cute and super quick.


The packaged set.

The finished result!


I've order some more Models Own nail varnish and will definitely be making another post about the colours.


Have you tried leopard print nails?

-Roxy
Related Posts Plugin for WordPress, Blogger...